


Hi everyone! My name is Ashley. I blog over at Mommy by day... Crafter by night. The name of my blog pretty much sums up my life at the moment (except I am a mommy by night too of course!) I have 2 little girls that are 2 1/2 and under. As you can imagine, with a baby and a toddler, my life is pretty crazy- but I love every minute of it. To keep myself sane, I craft! I love to push myself to my creative limit and I am always dreaming up a million projects at once! When my kiddos go to sleep at night, I get to crafting and blog about it.
Christmas is by far my favorite holiday of the year. For many, many reasons... Just one of them being that I get to put of my Christmas tree!!
I LOVE CHRISTMAS TREES!
There is just something about having a christmas tree in the room that just makes ya wanna burst into song... "Chestnuts roasting on an open fire... Jack Frost nipping at your nose"- Ok... ok... maybe I am the only one that feels that way, but you have to admit that a Christmas tree makes ya feel good! Right? I put my Christmas tree up over a week ago and I have been enjoying every second of it!

Today I am going to share my tips of decorating your Christmas Tree on a budget!
To start, let me tell you the story of my Christmas tree... I got it 5 years ago at Walmart. At the time, I didn't have a lot of money and I didn't have much space. It cost me a total of $29.99 and came pre-lit. 5 years later {still have no money, and limited space} and it works great. It's pretty sparse, but it does the job and I try to make up for the sparseness with decorations! So with that said, let me tell you my tips for decorating your tree on a budget.
Tip #1: Don't spend a ton of money on the actual tree. Like I said, mine cost $29.99 and it does the job! Of course down the road I would love to upgrade, but since I need to decorate on a budget, this tree works great! :) Whatever money you save on the tree you can put into ornaments and all the fun stuff:)
Tip #1: Don't spend a ton of money on the actual tree. Like I said, mine cost $29.99 and it does the job! Of course down the road I would love to upgrade, but since I need to decorate on a budget, this tree works great! :) Whatever money you save on the tree you can put into ornaments and all the fun stuff:)
Tip #2: Shop the after Christmas sales and clearance racks. Probably 85% of the decorations on my tree are things that I got 50-75% off at the after Christmas sales and saved to use for the next year. If you are like me, it's hard to do this because I want my tree to look perfect NOW! ;) But when you are trying to save money, this is a great thing to do. And just think- it will be so fun next year when you get to pull out all the new things you were able to get the year before on sale! It's like Christmas- Literally;)
Tip#3: Buy a little bit at a time. My tree has taken me 4 years to get it to the point it is now. It gets better every year and it is so fun to compare pictures from the previous years to see just how far my little tree has come!:) When you see something on sale throughout the year, snatch it up, add it to the Christmas pile. If you wait until Christmas time when all the stores have things full price, it can be pretty pricey to decorate your tree/house.
Tip #4: Buy things that aren't necessarily "Christmas decor" to decorate your tree. I love to use garlands and silk flowers in my tree to fill the sparse branches. These things can be found on sale throughout the year! This year I added 2 small berries wreaths to my tree to fill in the sparse areas- You can't even tell they are wreaths since I wiggled them into the tree branches.
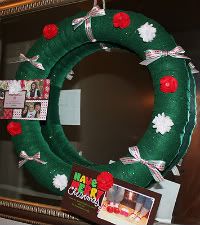
Tip #5: Watch for Christmas Sales (during the Christmas season) and use coupons... Hobby Lobby, Roberts, and Joann are great places to buy things because they almost always have a 40-50% off coupon that you can use on one item. This year, I bought the things to make my 20 Min Christmas Wreath for 50% off at Joann and Hobby Lobby- and I didn't even have to use a coupon since they were having a sale!
Tip #6: Buy big things to decorate with on your tree. Now my husband might fight me on this tip;) You should have been in the room when I pulled out my "new" treasures to put on my tree this year {the 2 BIG vintage looking bottle cap signs that say Happy Holidays and Merry Christmas}... Needless to say, my husband was a little worried about how big they are- But as I always say "Go big or go home!" Once I got the tree all done, he loved them! ;) I love decorating with big things! It fills up your tree super fast and I just love putting chunky things into my tree that aren't really supposed to be put on a Christmas tree. Now- I know some of you are thinking that I broke the cardinal rule of decorating with odd numbers since I only have 2 signs in my tree- I know that I TOTALLY broke that rule, but I don't think my tree could have handled another one and I am happy with the way it looks- rule breaking and all:)
Tip #7: Break all the rules. (This tip doesn't necessarily have anything to do with saving money) Decorate your Christmas tree how YOU think looks good. Put things on it that YOU like. Don't worry about what is in style or what this years colors are. Christmas trends come and go, so just buy things that you love- whether or not it is in style. If you love mauve- then decorate your tree in mauve- gosh darn it;) In the long run, you will be so glad that you went with your style instead of doing what everyone else is doing.
So now here is how I decorate my tree!
So now here is how I decorate my tree!
Step #1: Have the hubby put up the tree (see how sparse it is to start??)

Step #2: Put ribbons and garland on. Then add your biggest decorations next so you can make sure they are evenly placed. Here is where I added my 2 bottle cap signs (which I got last week at Hobby Lobby for 50% off- they were $5 each!! LOVE!)

Step #3: I added my 2 berry wreaths.
Can you see the red berries on the left side of this picture- it is one of the wreaths.

Step #4: Add all of your biggest ornaments first so you can space things out well. Add the smallest ornaments last to fill in the gaps.

Voila! You are done- Now you are ready to cuddle up with a blanket and a cup of hot cocoa and enjoy your masterpiece! :)

Thanks so much for letting me stop by!
Be sure to stop by and say hi if you get a chance! I have lots of fun sewing tutorials, crafting ideas, and printables!


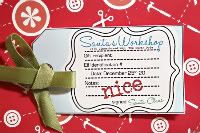
or a Dear Santa Letterform for your kiddos- I got ya covered:)
Hope you all have a great holiday season! :)
----------------------------------------------------------
Thanks so much, Ashley! I just love seeing the transformation your tree took! The berry wreaths are such a great idea. I wouldn't have thought of that. You can't even tell they're wreaths! I think I know what I'll be purchasing at the after-Christmas sales this year!!
If you are not familiar with Ashley and her fabulous blog, then please go get familiar! She is the sweetest girl who has the best ideas. Really. I think I'm probably going to try her Tied With a Bow Pouch tutorial for a Christmas gift, and how much would any little girl love to receive this Dolly Diaper Bag for Christmas?! And once the holiday rush settles down I can't wait to make this Anthropologie-Inspired Ruffle Shirt for myself!
Ashley's got some other fun stuff going on right now, too. Here in the next few days I'll be participating in her Holiday Traditions series. You should check out the fun ideas already posted.

And even though I dropped the ball on entering So You Think You Can Sew, I'm really excited to follow it!!
Thanks for reading and come back tomorrow for another great guest post!
Don't miss these fabulous giveaways!!


And be sure to check out the other guest posts from this week!


0 comments:
Post a Comment